Physical Address
304 North Cardinal St.
Dorchester Center, MA 02124
Physical Address
304 North Cardinal St.
Dorchester Center, MA 02124
This guide provides a detailed walkthrough to secure your website hosted on an IONOS Cloud Server, VPS, or Dedicated Server managed with Plesk using an SSL certificate. It also covers how to protect email addresses and webmail using the SSL certificate. The instructions are demonstrated using the Power User view in Plesk for better clarity.
Before you proceed, make sure that:
You have the following files available on your local computer:
The private key file.
The SSL certificate (public key) file.
The intermediate certificate (CA) file.
You have completed setting up your domain in Plesk, and it is visible under Websites & Domains.
Note: Instructions for downloading the SSL certificate and intermediate certificate are available here.
Log in to your Plesk dashboard as an administrator. The administrator role will ensure that you have the required permissions to manage SSL certificates and website security.
Once logged in, locate the navigation bar on the left side of the Plesk interface and click on Websites & Domains.
You will see a list of domains you manage. Click on the downward-pointing arrow next to the domain that you wish to secure to expand its settings.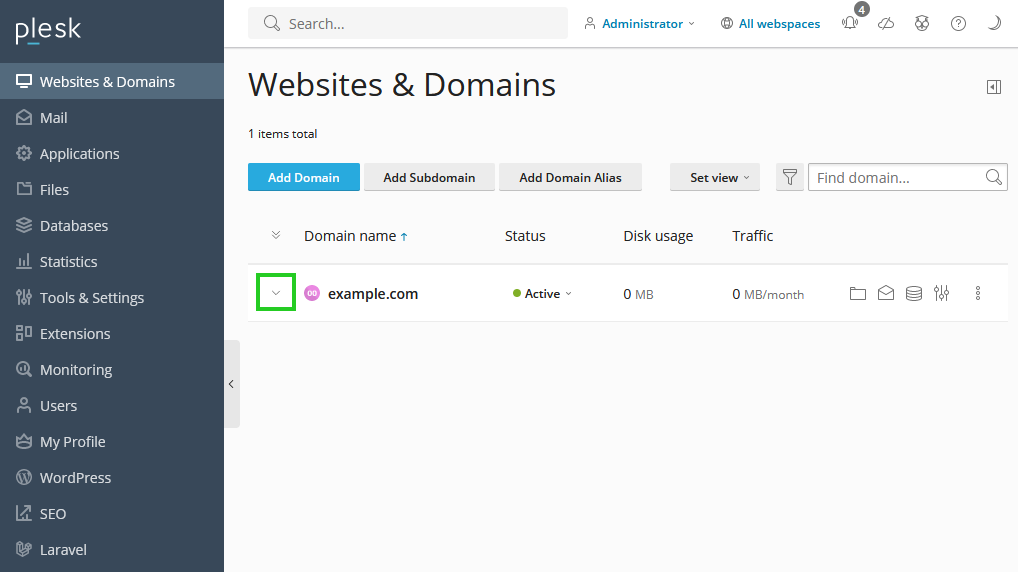
With the correct domain expanded, in the Dashboard tab, navigate to the Security section and click on SSL/TLS certificates. This section will allow you to manage certificates for the selected domain.![In the Dashboard tab, click SSL/TLS certificates in the Security section. The SSL/TLS certificate for [domain name] page is then displayed.](https://adminhowto.com/wp-content/uploads/2024/11/1794_EN_adding_ssl_plesk_02.png)
On the SSL/TLS certificate for [domain name] page, you will see different options for managing and adding certificates.
Optional: If your server is configured with multiple SSL certificates, you can select the certificate type under Which certificate are you looking for? to specify the intended use.
In the Download or remove existing certificates area, click on Manage. This will open the certificate management interface.
To upload an SSL certificate that you obtained from IONOS, click + Add SSL/TLS certificate. This will bring up the Add SSL/TLS certificate page.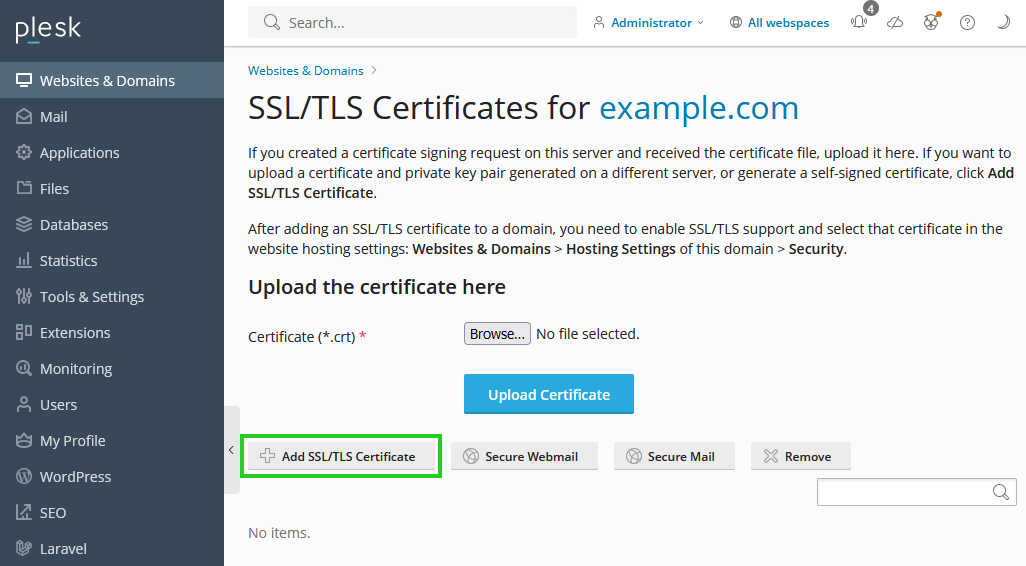
On the Upload certificate files section:
Use the Browse button to select the necessary files from your computer:
The private key file, usually named with a .key extension.
The SSL certificate (public key) file, usually with a .crt or .cer extension.
The CA certificate (intermediate certificate), which may have extensions like .crt or .cer.
Important: Rename the file extension of the intermediate certificate to .ca.cer if required, to ensure proper compatibility.
Once all files are selected, click on Upload certificate to store them on the server.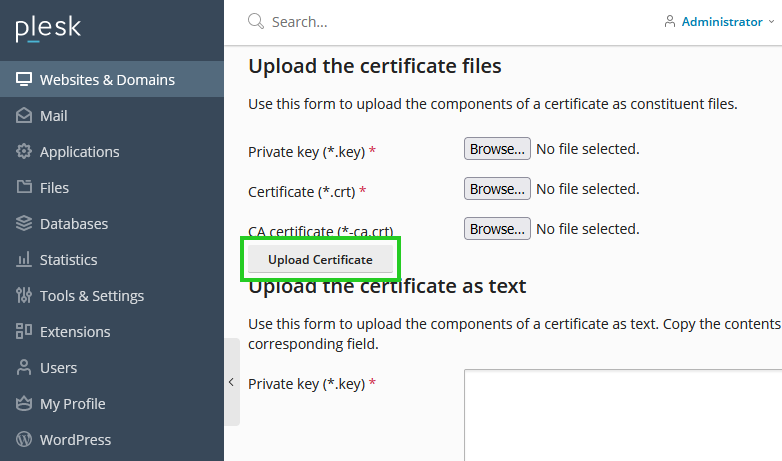
After the successful upload, the certificate will be displayed in the list. You can use this certificate to secure your domain.
Once the SSL certificate has been successfully uploaded, follow these steps to enable SSL on your website:
Return to the Websites & Domains page by selecting it in the navigation bar.
Go to the Hosting & DNS tab and select Hosting under your desired domain. This will lead you to the hosting settings page.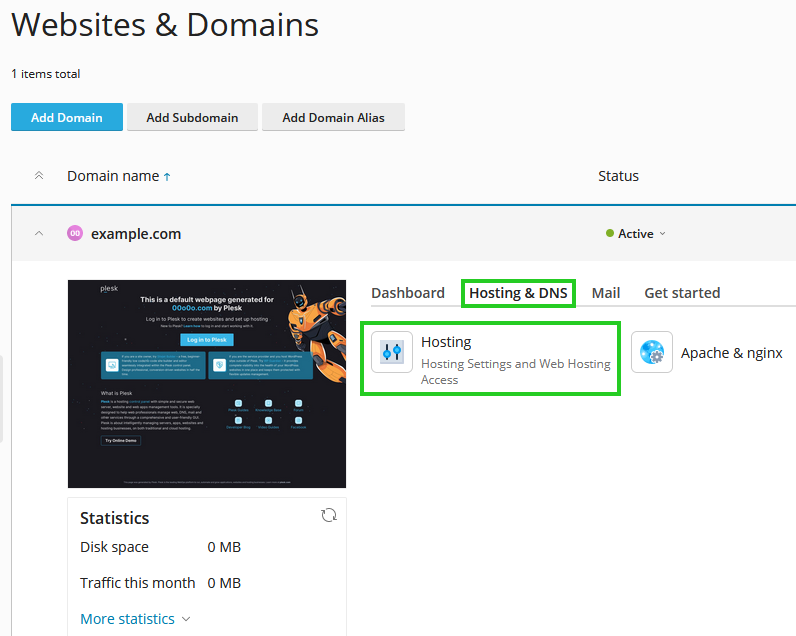
In the Domain settings section, locate the Preferred domain list. Here you can specify whether you want the domain to be accessed with or without the www prefix. Choose the preferred version.
Scroll down to the SSL/TLS support section and activate the checkbox labeled Enabled. This step is crucial to enable secure communications between your server and visitors.
Redirect visitors from HTTP to HTTPS: To ensure all users access your site securely, activate the Redirect visitors from HTTP to HTTPS option via an SEO-friendly 301 redirect. From the drop-down list, select the SSL certificate that you just uploaded. 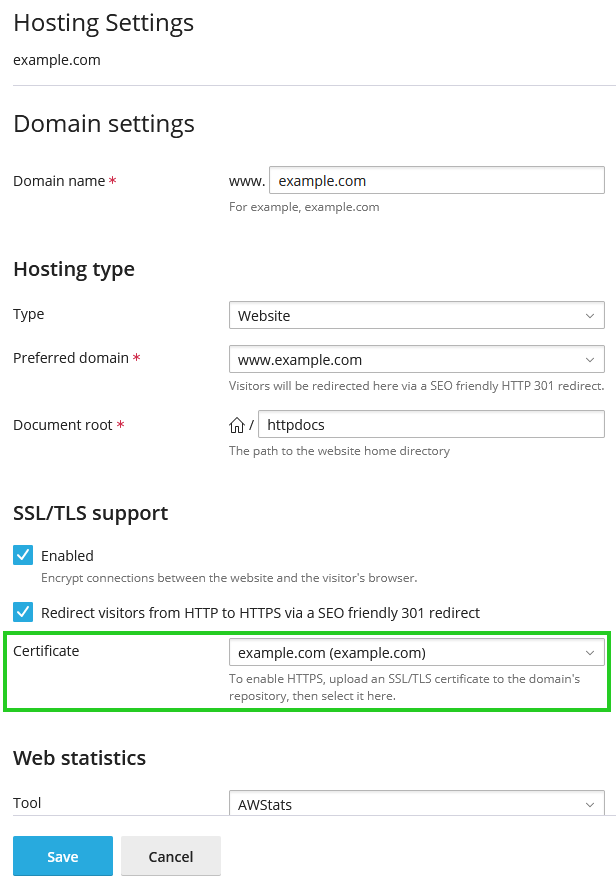
Click Save to apply these settings.
Your website is now accessible via https://yourdomain.tld. The redirect ensures that any visitor attempting to access the site through http will automatically be directed to the secure https version.
To further enhance security, it is essential to protect webmail and email services using SSL. Follow these steps:
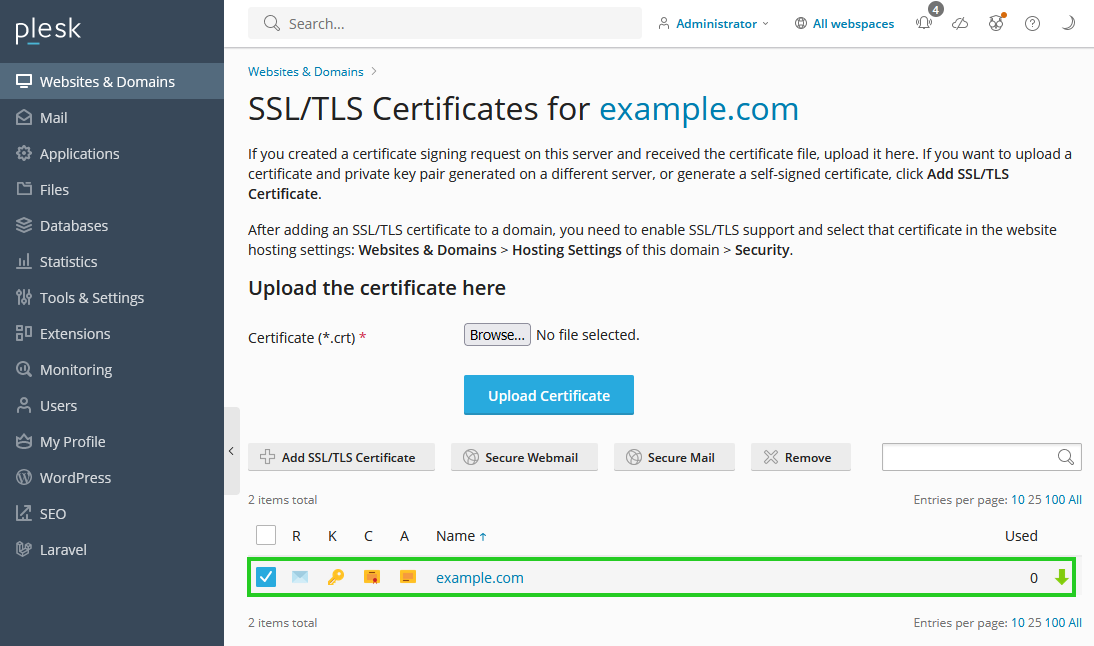
Go to the Websites & Domains section in Plesk and click on the SSL/TLS Certificates icon found in the Security section.
You will see a list of available certificates. Check the box next to the SSL certificate that you previously uploaded for your domain.
To secure the webmail, click on Secure webmail. This will ensure that all connections to your webmail interface are encrypted and protected.
To use the SSL certificate for securing email addresses associated with the domain (such as SMTP, POP3, and IMAP protocols), click on Secure mail.
By enabling these options, your webmail and email traffic will be protected, adding another layer of security to your communication channels.
Take your server management to the next level with IONOS. Whether you need more power for your website, secure backups, or want to host Windows applications, IONOS has you covered:
VPS Hosting: Enjoy dedicated resources with a flexible and scalable VPS hosting solution. Check out our VPS packages here: IONOS VPS Hosting
Windows VPS Hosting: Perfect for running Windows-based applications with full administrative control. Learn more about our Windows VPS options: IONOS Windows VPS Hosting
Cloud Backup: Keep your data safe and secure with our cloud backup solutions. Automated, scalable, and reliable: IONOS Cloud Backup
Secure your website, emails, and data with IONOS, and enjoy peace of mind knowing your information is protected.

