For Mail Basic and Mail Business Accounts
This guide explains how to manually migrate email messages from your old IONOS Mail Basic or Mail Business accounts to newly recreated accounts after completing an internal domain transfer. If you’d prefer an automated process, refer to the IONOS Email Migration Service article.
Key Details:
Email Accounts and Domain Transfers:
- Email accounts do not transfer with the domain during an internal domain transfer between packages.
- Instead, the associated email accounts are renamed using a backup domain format (e.g.,
@mailboxbackup.info), as the original domain is no longer available.
Renaming Process:
- Email addresses are renamed with the suffix
_0@mailboxbackup.info and the @ symbol is replaced with an underscore (_). - For example:
account@example.com → account_example.com_0@mailboxbackup.info.
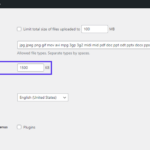
Character Limit:
- Renamed email addresses are limited to 25 characters.
Example:
jonathansmith@verylongexampledomainname.com → jonathansmith_verylongexa_0@mailboxbackup.info.
Recreation and Migration:
- You must recreate the original email address (e.g.,
account@example.com) in the package the domain was transferred to. - Emails can then be imported from the backup email (e.g.,
account_example.com_0@mailboxbackup.info) to the recreated address using IONOS Webmail.
Steps to Migrate Emails:
Log in to Webmail.
Access IONOS Webmail at webmail.ionos.com.
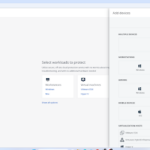
Add the Backup Email Account:
- Click Add Mail Account in the menu on the left (below your folders like Inbox, Drafts, etc.).
- Enter the
_0@mailboxbackup.info email address and its associated password (the same password used before the transfer). - Click Add. If a warning appears, click Ignore Warnings.
- If auto-configuration fails, select Manual configuration.
Configure Account Settings:
- Enter:
- Account Name: A descriptive name for the account.
- Your Name: Your preferred display name.
- Email Address:
_0@mailboxbackup.info.
Set Incoming Server Settings:
- Server Type: IMAP
- Server Name:
imap.ionos.com - Connection Security: SSL/TLS
- Server Port: 993
- Username: The
_0@mailboxbackup.info email address. - Password: The password previously used for the mailbox.
Set Outgoing Server (SMTP) Settings:
- Server Name:
smtp.ionos.com - Connection Security: StartTLS
- Server Port: 587
- Authentication: Same as the incoming mail server.
Save and Expand the Account:
- Click Save to finalize the settings.
- Expand the account by clicking the arrow next to it to view its folders.
Move Messages:
- Right-click on the Inbox (or other folder) in the backup email account and select Move all messages.
- Choose the corresponding folder in the recreated email account (e.g., Inbox) and click Move All.
Note: Large folders may take time to migrate.
Complete the Migration:
- Check that all messages have been moved to the recreated email account.
- If some messages are missing, you can repeat the process. Ensure the backup account (
_0@mailboxbackup.info) is not deleted or canceled until migration is complete.
Important Notes:
- Migration Duration: Moving large folders can take time but will run in the background until all messages are migrated.
- Backup Account Availability: Messages will remain accessible in the
_0@mailboxbackup.info mailbox until the account is deleted or the package is canceled.
Your new email account is now fully set up with migrated messages!