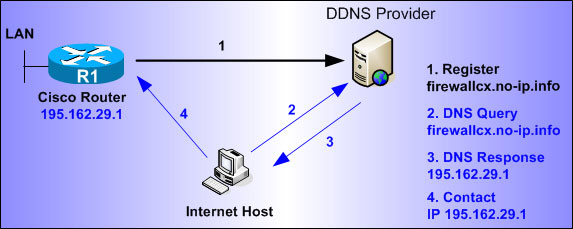
A static IP address is essential for ensuring that a computer, home network, or small business network can always be accessed online under the same hostname. This is particularly useful for applications like connecting to your home network through a VPN. However, if your network uses certain connection types like DSL, the ISP may assign a new (dynamic) IP address regularly, making it impossible to reliably access the network using a fixed IP.
To address this, you can implement Dynamic Domain Name System (DNS). This system updates the DNS records of your domain automatically whenever the IP address changes, ensuring your home or business network remains accessible under a consistent domain.
Using Dynamic DNS with the IONOS Multi-Platform Client
IONOS offers a Python-based, multi-platform client to manage Dynamic DNS updates. Below are the steps to install and configure the client:
1. Installing Python on Ubuntu
First, ensure Python is installed on your system:
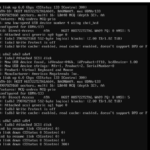
- Verify Python installation:
python --version
- Verify pip installation:
pip --version
If Python is not installed, follow these commands to set it up:
sudo apt update
sudo apt upgrade
sudo apt install software-properties-common
sudo apt-get install python3
To install pip:
apt install python-pip
2. Installing and Configuring the Multi-Platform Client
Install the multi-platform client with:
pip install domain-connect-dyndns
To configure the domain for automatic DNS updates:
domain-connect-dyndns setup --domain YOUR_DOMAIN_NAME
Example:
domain-connect-dyndns setup --domain example.com
Follow these steps:
- Copy the generated URL and open it in a browser.
- Log in to IONOS and click “Allow.”
- Copy the displayed code and paste it into your command prompt.
To update all domains:
domain-connect-dyndns update --all
Example Output:
[root@localhost ~]# domain-connect-dyndns update --all
Read example.com config.
IP 217.160.25.20 found in A record
New IP: 217.160.25.20
A record up to date.
3. Scheduling Updates with Cron
To ensure the IP address is updated regularly, configure a cron job:
- Open the crontab file:
crontab -e
- Add the following entry:
*/1 * * * * /usr/bin/flock -n /tmp/ipupdate.lck /usr/local/bin/domain-connect-dyndns update --all --config /root/dyndns/settings.txt
Note: Cron jobs are managed by the Cron Daemon, a service for executing scheduled tasks. Refer to documentation on cron syntax and configuration if needed.
By following these steps, you can maintain a consistent connection to your network even with a dynamic IP.