There may come a time when a USB drive is formatted in an unusual file system, such as when used with a Smart TV, or when a large portion of the device is allocated to an unmanageable EFI partition. While Windows’ built-in Disk Management utility can handle basic formatting tasks, it is often unable to delete these protected partitions.
To fully erase and reformat your USB drive, follow this step-by-step guide using Windows Diskpart, a powerful command-line utility.
⚠ Warning:
This process will completely erase all data on the USB drive. Proceed only if you are certain you no longer need any files stored on it.
Step 1: Open Command Prompt as Administrator
- Click the Start Menu and type
cmd. - Right-click on Command Prompt and select Run as administrator.
- If prompted by User Account Control (UAC), click Yes.
Step 2: Launch Diskpart
Once the Command Prompt window opens, type:
diskpart
Press Enter to launch the Diskpart utility.
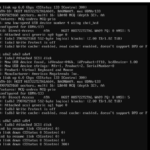
Step 3: List Available Drives
To see all detected storage devices, enter the following command:
list disk
This will display all storage drives connected to your system.
Important: Each drive is labeled as Disk 0, Disk 1, Disk 2, etc. Identify the USB drive by checking its size.
Step 4: Select the USB Drive
Once you identify your USB drive, select it by replacing X with the correct disk number:
select disk X
⚠ Double-check the selected disk! If you choose the wrong one, you may erase your primary hard drive.
To confirm the selection, type:
detail disk
This will display details about the selected disk to ensure it’s the correct one.
Step 5: Remove Existing Partitions
List all partitions on the selected disk:
list partition
If any partitions exist, delete them one by one. Start with the first partition, replacing X with the partition number:
select partition X
delete partition override
Repeat this step for all remaining partitions.
Step 6: Create a New Partition
Once all partitions are deleted, create a new primary partition:
create partition primary
Step 7: Format the USB Drive
Now, format the drive using your desired file system. For most USB drives, FAT32 is a good choice for compatibility, but if you need to store files larger than 4GB, choose NTFS instead.
For FAT32:
format fs=fat32 quick
For NTFS:
format fs=ntfs quick
For exFAT (recommended for cross-platform usage on Windows and macOS):
format fs=exfat quick
The quick parameter speeds up the process by skipping a full surface scan.
Step 8: Assign a Drive Letter
To make the USB drive accessible in File Explorer, assign it a letter:
assign
You can specify a particular letter by using:
assign letter=Z
(Replace Z with your preferred letter.)
Step 9: Exit Diskpart
Once the process is complete, exit the utility:
exit
Now, your USB drive is fully formatted and ready for use.
Troubleshooting Tips
- If Diskpart fails to delete partitions, try running the following command before reattempting:
clean
This will wipe all partitions and data from the selected drive. - If the USB drive is not recognized after formatting, unplug it, restart your computer, and plug it back in.
- If the format process takes too long, retry with the quick parameter.
This guide ensures you can properly erase and reformat any USB drive, making it usable for new storage needs. 🚀