If you’ve experienced data loss or need to revert to a previous state, restoring data on your Plesk server can be done efficiently by following these steps:
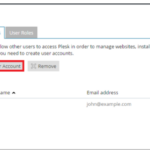
1. Log in to Your Plesk Panel
Access your Plesk control panel using your administrator credentials.
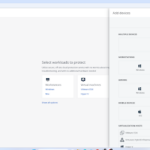
2. Open Backup Manager
- For server-wide backups, navigate to Tools & Settings > Backup Manager.
- For specific domains, go to the respective domain and open Backup Manager.
3. Select the Backup File
- Locate the desired backup archive in the list within the Backup Manager.
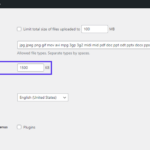
- If the backup file is not listed, use the Upload option to add the file from your local machine.
4. Initiate Restoration
- Decide whether to restore the entire server, specific domains, or selected data (e.g., files, databases, or emails).
- Click Restore, and confirm the scope of the restoration.
5. Monitor the Restoration Process
- Confirm warnings about data being overwritten.
- Monitor the progress and review the logs for any errors during the process.
6. Verify Restored Data
Once the restoration is complete, verify the data to ensure everything has been successfully restored as expected.
For detailed guidance, refer to the official Plesk documentation on backups and restoration processes.
For high-performance and flexible hosting solutions, consider our VPS packages. They offer scalable resources tailored to your needs.
Please use the following link to review our VPS packages.
Restoring Data on Your Plesk Server
If you’ve experienced data loss or need to revert to a previous state, restoring data on your Plesk server can be done efficiently by following these steps:
1. Log in to Your Plesk Panel
Access your Plesk control panel using your administrator credentials.
2. Open Backup Manager
- For server-wide backups, navigate to Tools & Settings > Backup Manager.
- For specific domains, go to the respective domain and open Backup Manager.
3. Select the Backup File
- Locate the desired backup archive in the list within the Backup Manager.
- If the backup file is not listed, use the Upload option to add the file from your local machine.
4. Initiate Restoration
- Decide whether to restore the entire server, specific domains, or selected data (e.g., files, databases, or emails).
- Click Restore, and confirm the scope of the restoration.
5. Monitor the Restoration Process
- Confirm warnings about data being overwritten.
- Monitor the progress and review the logs for any errors during the process.
6. Verify Restored Data
Once the restoration is complete, verify the data to ensure everything has been successfully restored as expected.
For detailed guidance, refer to the official Plesk documentation on backups and restoration processes.
For high-performance and flexible hosting solutions, consider our VPS packages. They offer scalable resources tailored to your needs.
Please use the following link to review our VPS packages.